
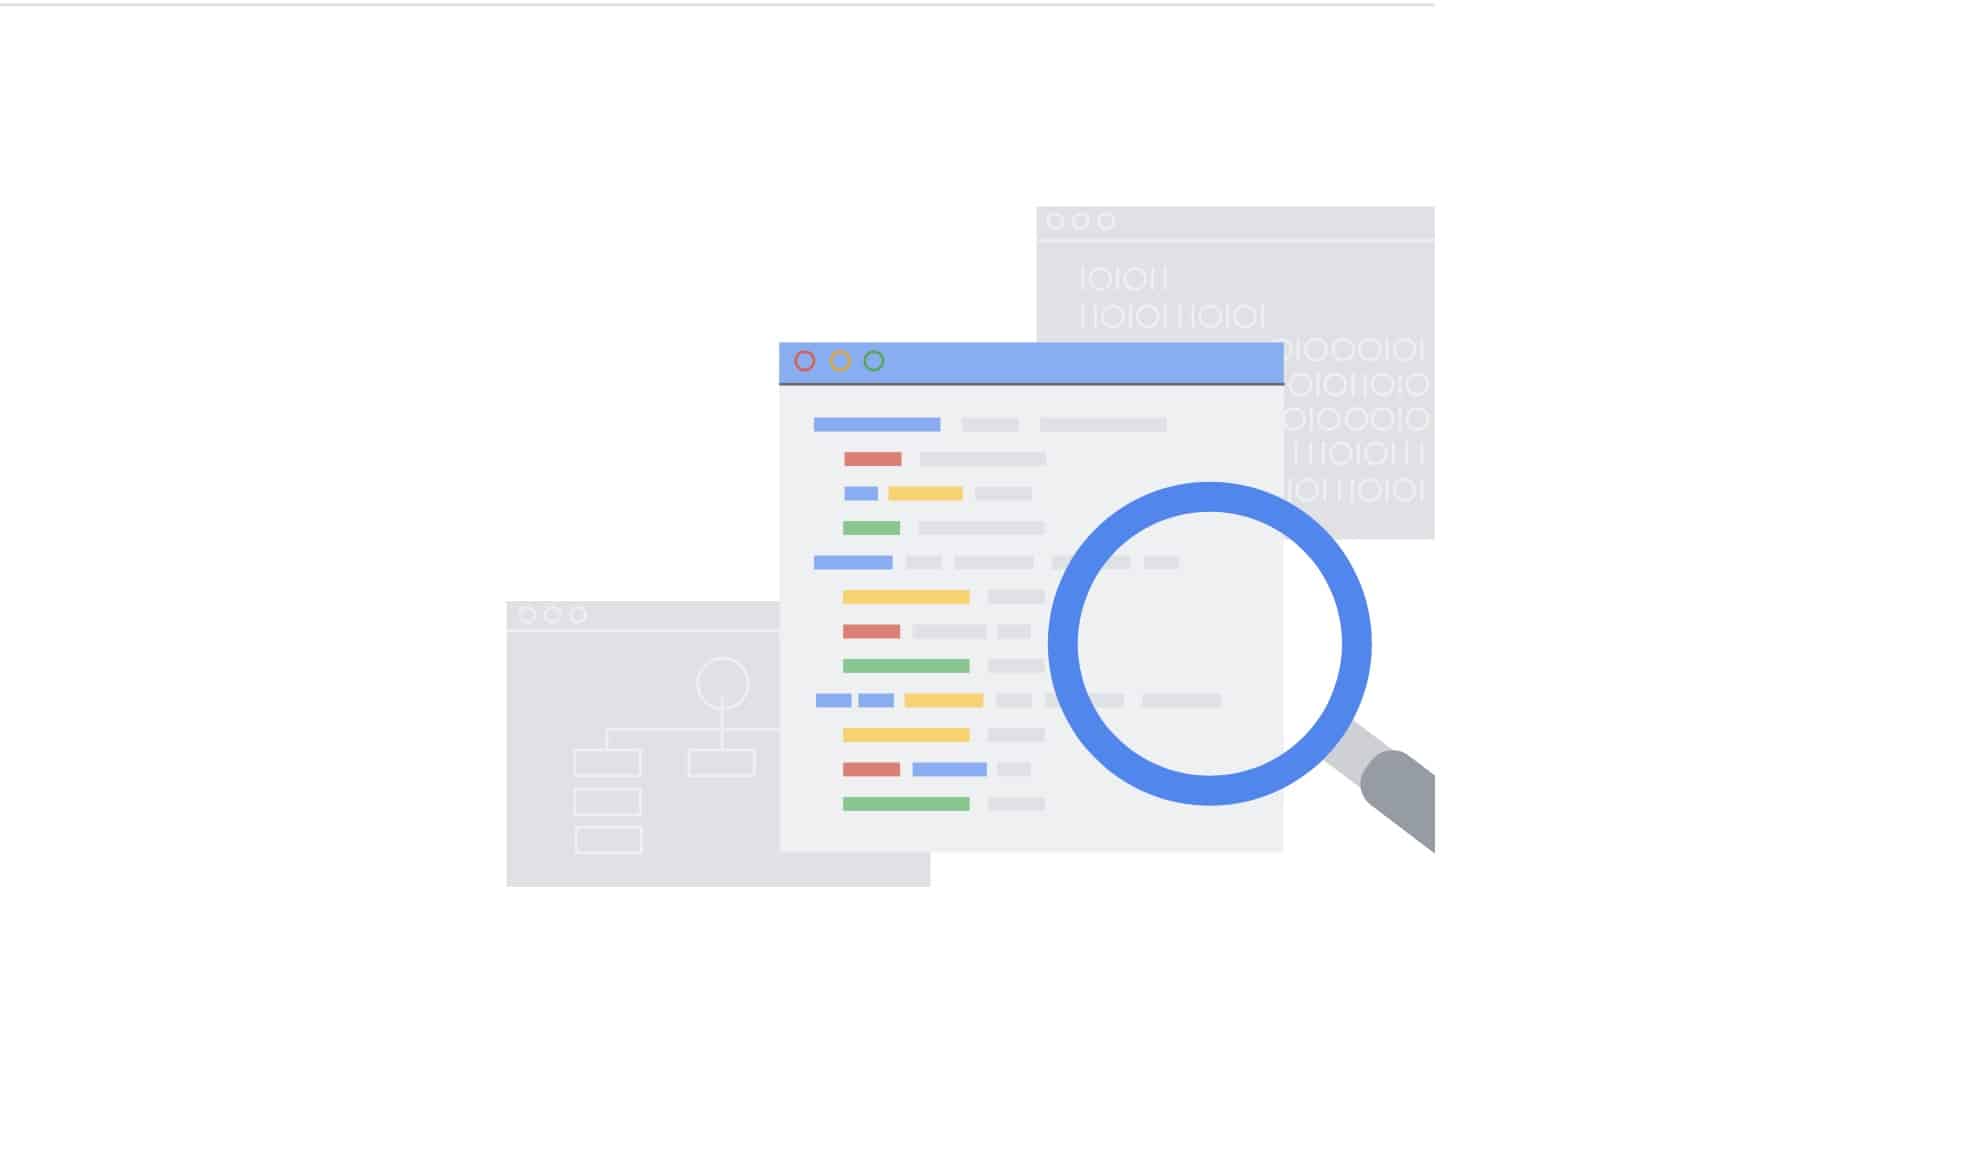
Google Search Console: How to Get Started
The Google Search Console is a fantastic tool that offers a great deal for SEO specialists and online marketers. It brings a lot to the table when it comes to finding information about your website and the people that visit it. This data comes in handy for anyone running a website but can be a particularly potent marketing tool. This article will aim to show you the basics of signing up and just how to verify your website.
Google Search Console 101
The Google search console is good for deriving a lot of handy information, including user data (how many people visit your site, how they find it), device usage (whether people visiting are mobile device users or desktop computer users), and which pages on your site are the most popular. The tool also serves additional functions like allowing users to fix website errors, submit a sitemap, and create/check a robots.txt file.

With all this useful insight on offer for free, you’ll want to get on it ASAP. Here’s how to get started with verifying and registering:
First, log into your Search Console account and you’ll see a box next to a button which says “Add Property”. It should be in a drop-down menu (next to a list of other properties in case it already found another URL you frequently use). Enter a URL and voila! You’ve added your first site, however, it is still not verified. This part gets trickier as there are a whole bunch of methods, and the most suitable one can depend on your needs.
Verification Methods
The main deciding factors for which method is most suitable for you come down to what programs and codes you’re most comfortable using. This comes down to whether you have experience working with HTML, whether you want to upload files, and whether you want to run other Google programs in tandem with the Search Console. We’ll discuss each of these and the common errors people make when using them. Once you’ve followed one of the methods listed below, you can click the verify your site by pressing button.
HTML Tags
The HTML Tag method is suitable for anyone familiar with HTML. This type of tag is specific to each user and tied to them directly. You can verify your ownership of a site by adding a <meta> tag to the HTML of a specified page. Google can then verify that the meta tag exists in the correct location. If they can’t find the tag, there are several errors that may have possibly occurred. In most instances, Google will let you know what went wrong.
Starting from the Search Console dashboard, choose “Manage Property” and then click on “Verify this property.” If the “HTML Tag” option does not appear under “Recommended method,” then you should click on the “other verification methods” area below and select “HTML tag.” This will provide you with the HTML code that can lead to verification. Copy this code and open it using your HTML editor. Paste the code in the <Head> section of the website’s own HTML code. Even if your site has a meta tag already present (or any other code in the <Head> section), you should put this code there. If your site doesn’t already have a <Head> section, you can create one for the sake of verifying the site. Also, do not remove the code. It will un-verify your site.
If the meta tag isn’t on the home page, Google won’t be able to find it. The homepage is often named index.html or index.htm but could be named differently, depending on your server’s configuration. If you’re using a web editor or a WYSIWYG editor to edit your page, make sure you’ve selected the ‘Edit HTML’ option or are editing the source code of the page.
HTML Files
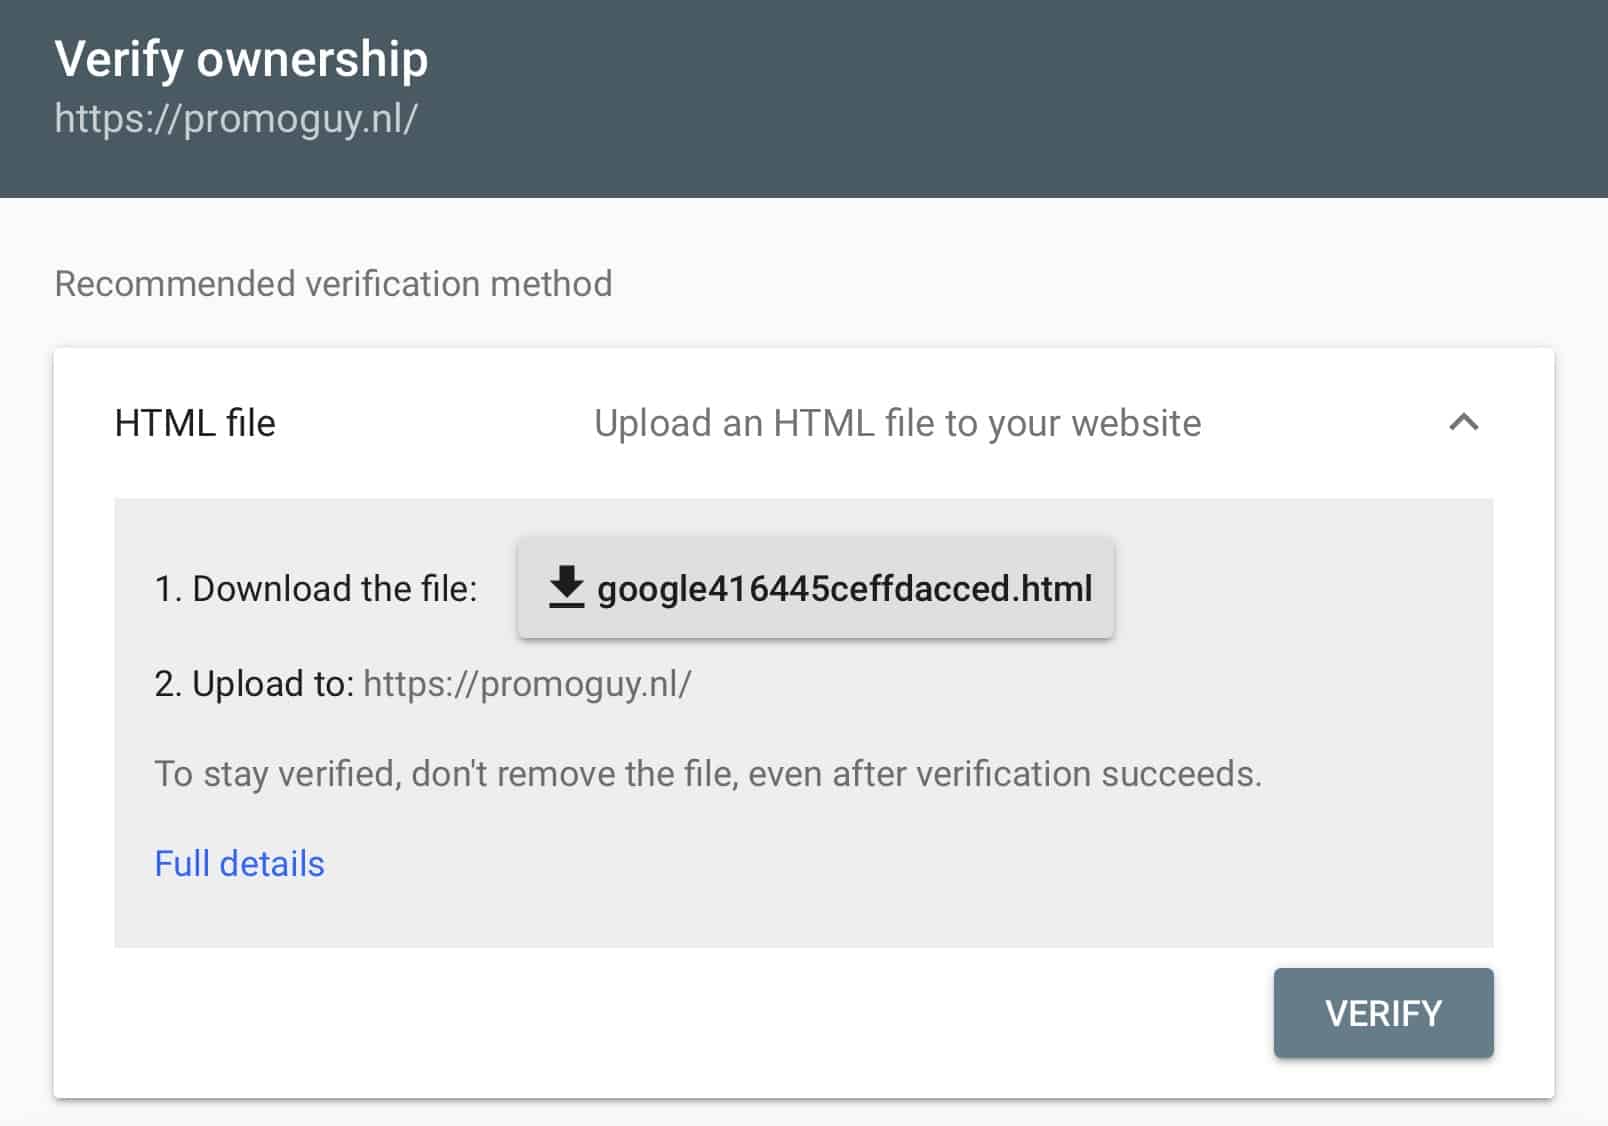
Another HTML-based method is to use files. Similar to the HTML tag, this is also specific to each user. To upload an HTML file you must find where to put up files into a site’s root directory. From the Search Console dashboard, select “Manage site,” then “Verify this site.” If “HTML file upload” is not listed under “Recommended method,” it should be listed under the “other verification methods” area.
You will be asked to download an HTML file and then you can upload it to the specified location. Do not alter the contents of the file or even the filename. Any changes will mean that Search Console will not be able to verify the site. After the HTML file has been uploaded, go back to Search Console and click “Verify.” If everything has been uploaded correctly, you will see a page letting you know the site has been verified. Once you have verified your site using this method, do not delete the HTML file from your site. This will cause your site to become unverified.
Verify Google Search Console via DNS Provider
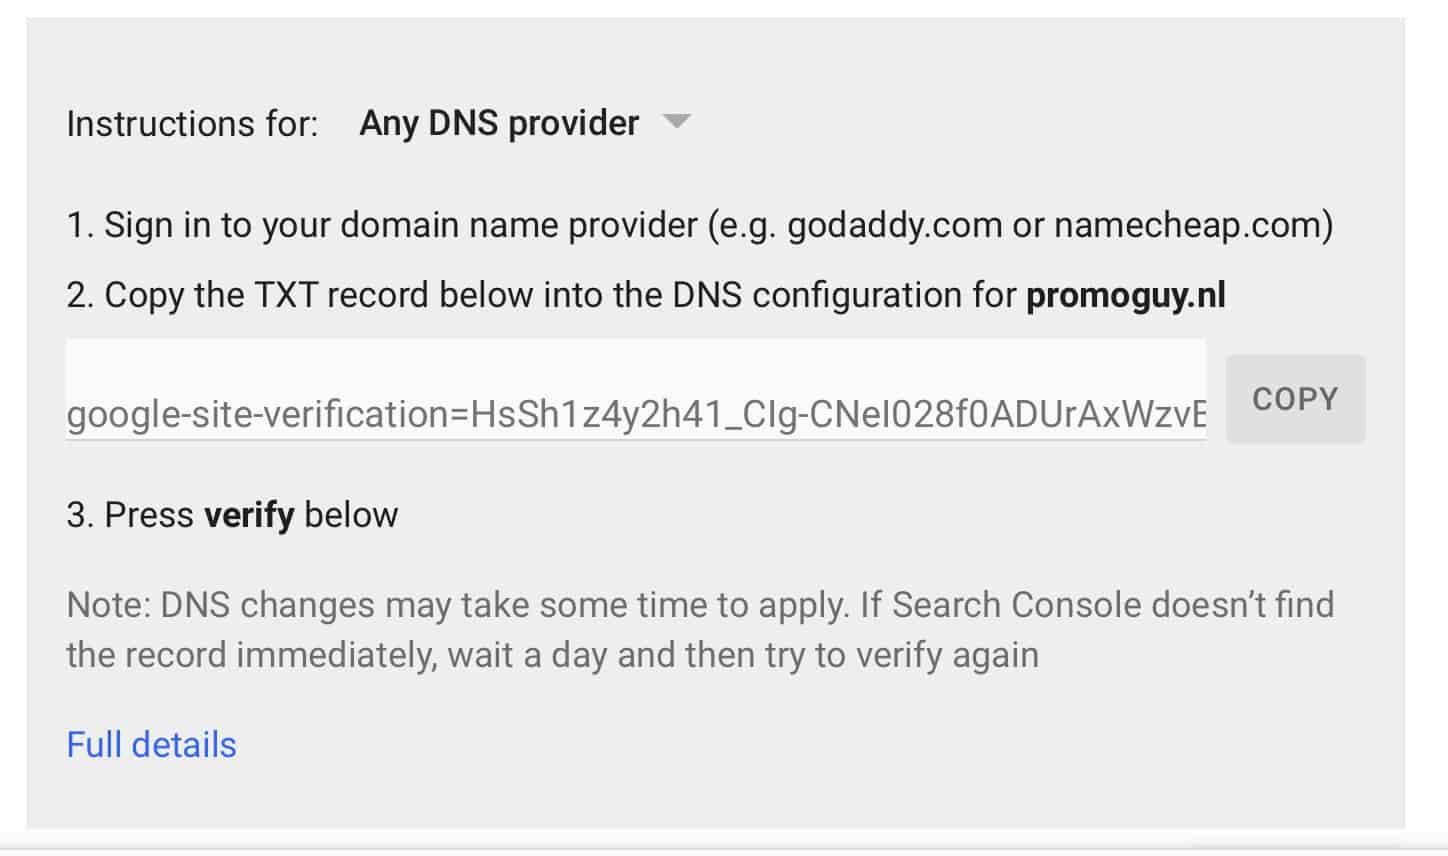
The DNS provider (or domain name provider) is the company you purchase a domain from. They host your website so they can also be used as a means of verification. This verification gets you authorisation from the DNS provider, so it proves you’re the owner of the main domain and all of the subdomains and subdirectories associated with it. This is an ideal option for anyone with a large website.
After you select “Domain name provider” as the verification method, you have to choose one from a list of commonly used providers, such as namecheap.com. If your provider is not on this list, choose “Other” and you will be given instructions on how to create a DNS TXT record for your provider. If a DNS TXT record doesn’t work for your provider, you will have the option of creating a CNAME record instead.
Linking Search Console With Google Analytics
If you are already a Google Analytics (GA) user, this option might be the most convenient for you. To get started, you’ll need to be able to check the site’s HTML code. Now you need to make sure the Google Analytics tracking code is placed within the <Head> section of your homepage’s code. This should be your analytics.js or gtag.js snippet. From the Google Search Console dashboard, select “Manage site,” then “Verify this site”. When you select “Google Analytics tracking method,” you’ll be provided with a series of instructions to follow.
Google Tag Manager
If you already use Google Tag Manager (GTM) for your site, this may be the easiest method. you need to have “View, Edit, and Manage” permissions enabled in GTM. Another thing to make sure of before you attempt this one is examining the HTML for a GTM code. If you have one, the GTM code should appear immediately after your site’s <Body> tag.
Then, from the Search Console dashboard, select “Manage site,” then “Verify this site”. Select “Google Tag Manager” and click “Verify.” If the Google Tag Manager code is found, you should see a screen letting you know your site has been verified. Once your site is verified, do not remove the GTM code from your site. If you do this, your site will become unverified.